Tuesday, January 24, 2012

Valentine Cards

I can't believe how quickly time goes by!!
Valentine's Day is just around the corner so I decided to make some cute little cards :)
Valentine card set
 
Now... I can't take full credit for this one...
those Glitter Splatters are a technique I learned over at swissgirlDesigns
Valentine card set

Aren't they so fun!! I was dying to try this out and finally had a project that was perfect for them!
I love the way they look and love the added touch of glitter on a simple card like this.
 
If you would like to purchase a card set for Valentine's Day please contact me :)
What has been your favorite technique lately? I would love to hear!!
Thank you for stopping by!!
:)

Saturday, January 14, 2012

Mini Album- Cali 2008!

Hey everyone!! I have a mini album to share with you!
I used the Playground collection by Echo Park!
I love the bright colors and the fun feel to this collection!
I know its not new but I've been hanging on to it for a while now to use on the perfect project!!
I stitched on each page with my new sewing machine! I know I'm not a pro or anything... yet! lol
But I am happy with how it turned out, my not so perfect stitching gave the mini a fun feel!!
Now for the pictures! :)
Cali mini- Cover

Cali mini- pages 1 & 2

Cali mini- pages 3 & 4

Cali mini- pages 5 & 6

Cali mini- pages 7 & 8

Cali mini- pages 9 & 10

Cali mini- pages 11 & 12

Cali mini- pages 13 & 14

Cali mini- pages 15 & 16

Cali mini- pages 17 & 18

Cali mini- pages 19 & 20

Thank you for stopping by!
:)

Monday, January 9, 2012

Paper Garland Tutorial!

Hey everyone!! I wanted to share an easy tutorial with you!
Last night I learned how to make a paper garland (I rencently recieved my sewing machine and have been trying new things!!) This project is super quick and easy to make! It is also very inexpensive and adds the perfect handmade touch during the holidays or parties.
Step 8
Lets get started!

Step 1:
Step 1
*Select the papers or cardstocks you would like to use. Make sure you use double sided papers since both sides will be showing. I used three different patterns of double sided papers. These are from the Echo Park "a walk in the park" 6x6 paper pad.
Step 2:
Step 2
*Select which punches or die-cuts you would like to use. Punch out as many or as little as you would like depending on the lenght you want your garland to be. I punched a total of 63 shapes.
Step 3:
Step 3
You can lay out a pattern if you like or randomly sew the pieces together. The top row the is front side of the papers and the bottom row is the back :)
Steps 4 and 5:
1234
*Get ready to sew. You can use different color threads if you like, I am using white for the top thread and the bobbin. Be sure to direct the thread towards the back of the machine and tie a knot with the threads.
 *Make sure your straight stitch setting is on the smallest stitch.
*Run the machine about three inches before placing any of the papers in. Guide the thread without pulling on it.  
*Start sewing the shapes in the pattern you'd like.
*Let the machine run about half an inch in between each shape.
*With the hearts I like to put them through the machine different ways so when the garland hangs they face different directions.
*Once you get to the end let the machine run again for three inches. You can leave the thread hanging off if you like or you can tie it off at the paper and cut the extra thread off.
Step 10
Suuuper easy!
These would be perfect to hang on your Christmas tree, use for a New Years party, a birthday party, Halloween, anything!! I love these since they are a decoration that you don't feel stuck with due to cost! I hope you give it a try!!
If you have any questions please leave me a comment and I will be happy to answer!
Thank you for stopping by!! :)

What is your favorite handmade home decor?

Wednesday, January 4, 2012

I Fell in LOVE and Couldn't Pass it Up!

Yesterday I went to a huge antique store here in Las Vegas.
I went there just to look (that place is usually expensive) but I found some beauties.
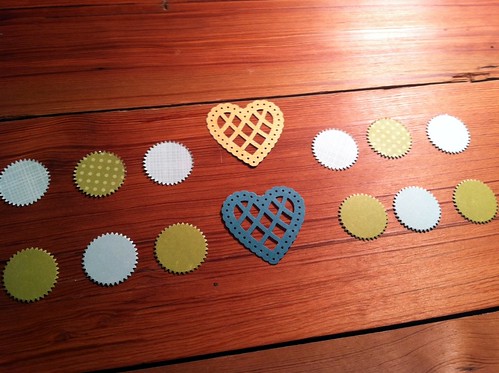
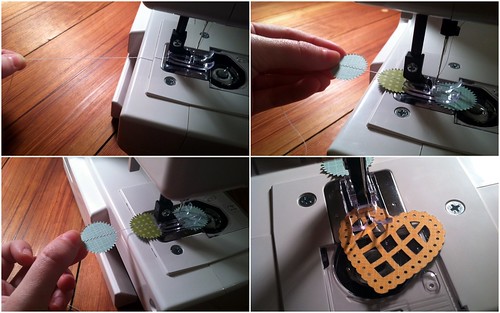
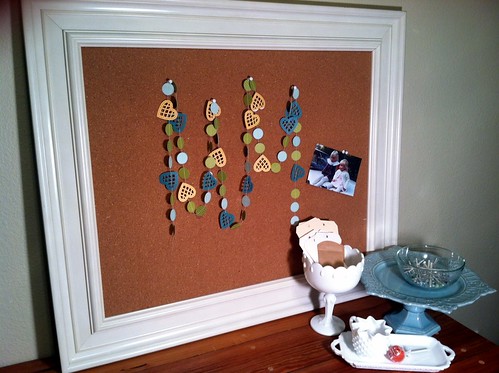
First let me share a couple photos with you and we can get back to the mushy love part :)
Jan. 2nd
I loved a ton of the frames and mirrors they had this time around... but they sure are priced
to break the bank!! So maybe next time someone will price to sell :)
Jan. 2nd
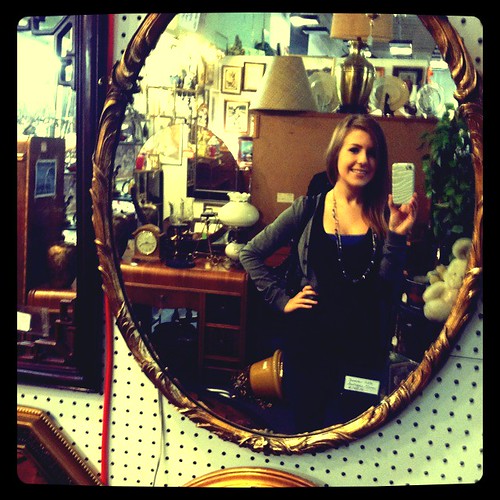
This was just too funny... of course I had to take a picture are share with you!!
Now to the good part.
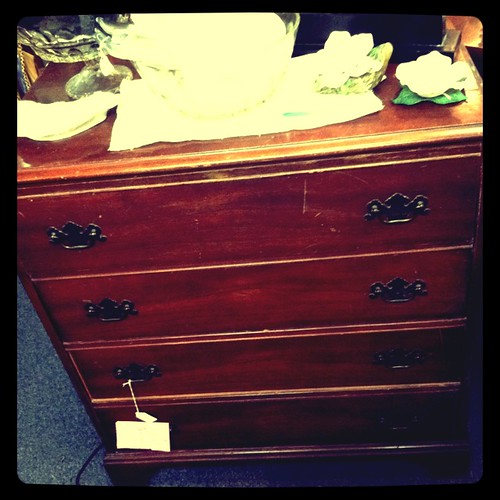
So we weren't looking around for too long when I ran into this pretty piece!
Jan. 2nd
I stood there looking at it for about 10 minutes. Being priced at $165 wasn't bad... at least not for this store! The top drawer comes down so it can be a little desk. It would be perfect for a sewing machine and I just loved all the details. I had to keep walking around though and think about it :)
I found another desk that I didn't take a photo of, it would be perfect for a sewing machine also, and it was 50% off and came out to $90!!!! It needed a paint job, but the price was still perfect :)
So... Still walking around and this is where the love part came in!! Something that I thought I would never be able to afford... something that I have been wanting but only thought I can see them in magazines or on the internet....
can you guess??
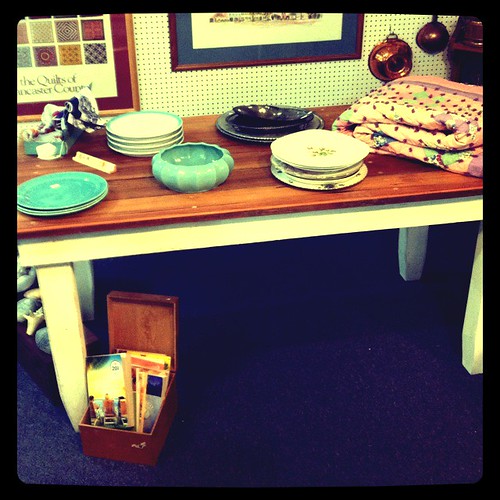
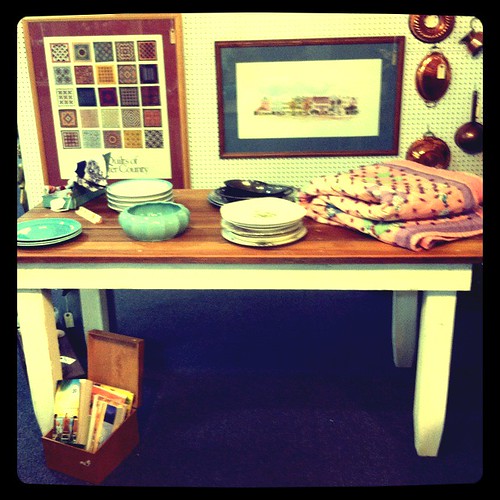
An Antique Farmhouse table!!!!!!!
Jan. 2nd
Finding one of these in Vegas is impossible!!! I have never seen one in person! The top is over 100 years old!!! The owner just moved here from Texas and it was recently put in the store to sell!
He refinished it but you can see the age on the bottom and it is GORGEOUS!!!
Jan. 2nd
I stood by it for about 15 minutes just thinking... totally forgot to look at the price tag because I was just goo goo gaga over this thing!! I was also scared to look thinking it would be alot.
It turns out that it was only $175!!!!!!!!!!!
I have never seen one of these things for less than $500. I ran to the cashier and put money down on it so now this baby belongs to me! I am sooo excited! I can't wait to bring it home!!!
I have been looking for a crafting table for two years now! TWO YEARS!! That is was to long!
I am so glad that I waited though since I found the perfect one!!
I just have to say once more that I'm in LOVE!! lol
I will post photos when I have it in the craft room! YAY!
:)
What antique find have you fallin in love with and just HAD to have? I'd love to hear!!
Thank you for stopping by!

Monday, January 2, 2012

Keeping Track of 2012!!

Happy New Year!!
One of my goals for the new year is to complete a 12x12 album!!
I'm mostly doing mini albums or altering something and thought I would challenge myself with a full album!! So I will be doing a journal type of album for this challenge! I am going to be taking photos on the days something special happens or if I have some journaling that will go with that photo. I usually do minis because I scrap event photos. I've never done an album from different days or events so this will be exciting! I've already started taking pictures for it :)
Something else I want to really work on is posting on here more!!! The 2012 album sure will help with posts :) I need to find more projects to share with you and maybe even more furniture renos to share with you and organizing ideas... (ok so anything I think would be fun to share lol) 
Another goal is to furnish and organize my craft room!!!! I know I have been talking about this for awhile now, but you have no idea how picky I have been. I have a hard time spending alot of money on veneer pieces even though I fall in love with them... I have some exciting news to share with you tomorrow!!!
Jan. 1st
(This is what the 2012 photos will look like! Love the vintage feel!)
I hope everyone had a blast for the holidays!!
Let me know what some of your goals are for the new year! I would love to hear!!
Thanks for stopping by!!!